Pillar Security is an all-in-one platform that empowers organizations to monitor, assess risks, and secure their AI activities.
You can now use Pillar’s advanced detection & evaluation models on Portkey with our open source integration, and make your app secure and reliable.
To get started with Pillar, chat with their team here:
Get a Demo - Build, run, and use AI with confidence.
Using Pillar with Portkey
1. Add Pillar API Key to Portkey
- Navigate to the
Integrations page under Settings
- Click on the edit button for the Pillar integration and add your API key
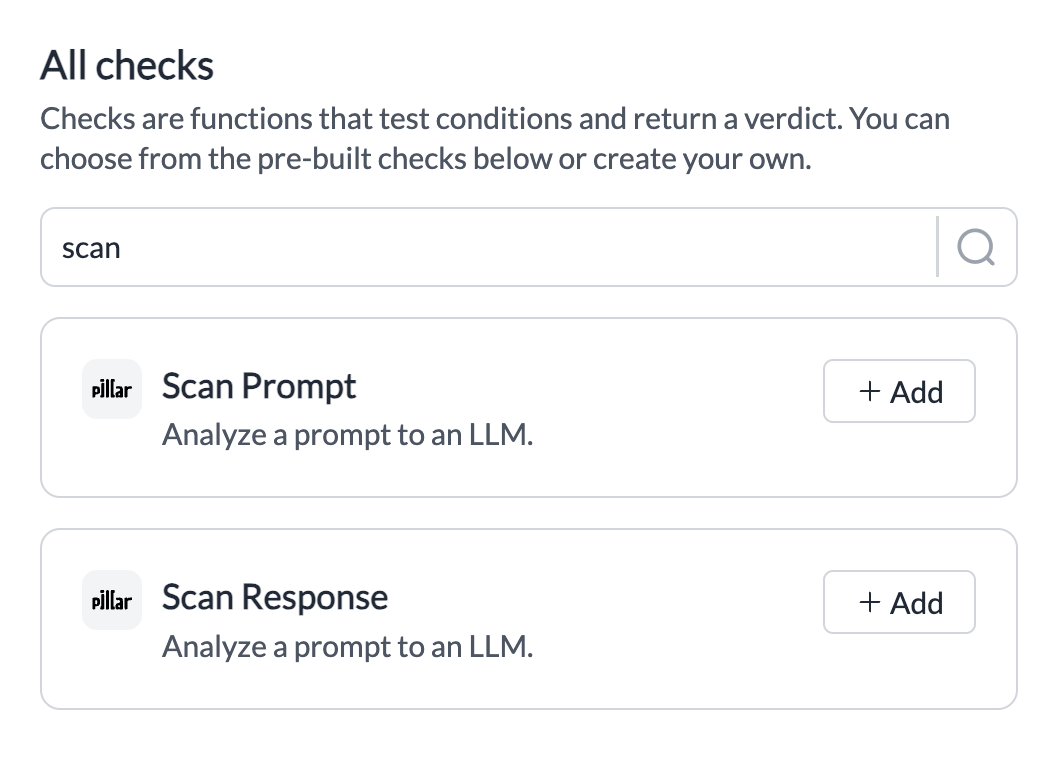
2. Add Pillar’s Guardrail Check
- Now, navigate to the “Guardrails” page
- Search for Pillar’s Guardrail Checks
Scan Prompt or Scan Response and click on Add
- Pick the info you’d like scanned and save the check.
- Set any actions you want on your check, and create the Guardrail!
| Check Name | Description | Parameters | Supported Hooks |
|---|
| Scan Prompt | Analyses your inputs for prompt injection, PII, Secrets, Toxic Language, and Invisible Character | Dropdown | beforeRequestHooks |
| Scan Response | Analyses your outputs for PII, Secrets, and Toxic Language | Dropdown | afterRequestHooks |
 Your Pillar Guardrail is now ready to be added to any Portkey request you’d like!
3. Add Guardrail ID to a Config and Make Your Request
- When you save a Guardrail, you’ll get an associated Guardrail ID - add this ID to the
before_request_hooks or after_request_hooks params in your Portkey Config
- Save this Config and pass it along with any Portkey request you’re making!
Your requests are now guarded by your Pillar checks and you can see the Verdict and any action you take directly on Portkey logs! More detailed logs for your requests will also be available on your Pillar dashboard.
Get Support
If you face any issues with the Pillar integration, just ping the @Pillar team on the community forum. Last modified on February 2, 2026
