Setting up SCIM Provisioning
-
Navigate to the app settings. Under general settings, enable the SCIM provisioning checkbox.
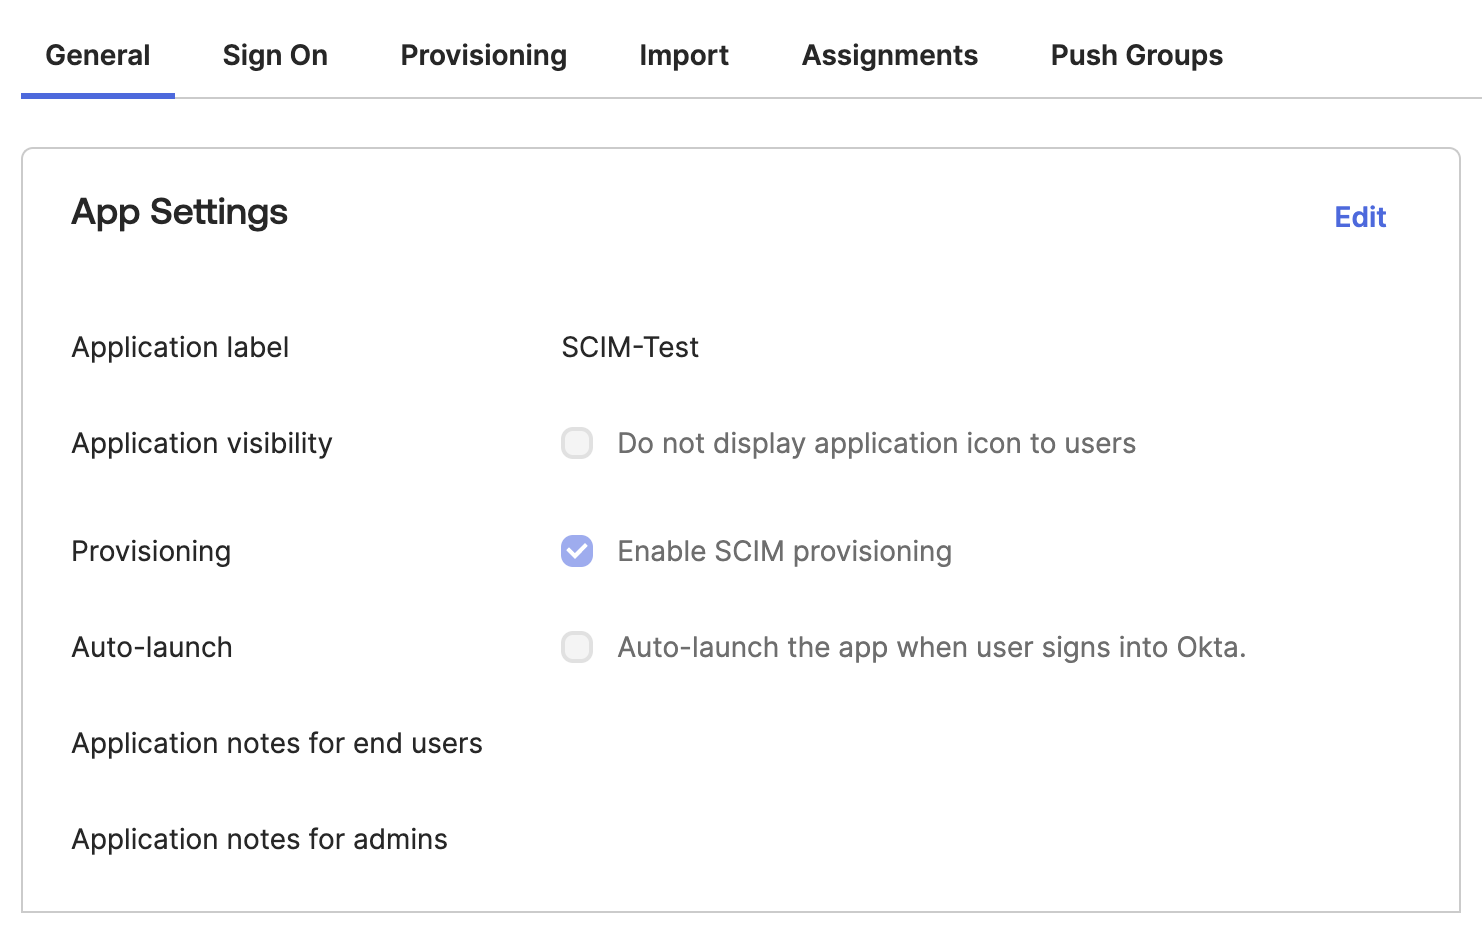 The
TheProvisioningtab should be visible after enabling SCIM provisioning. Navigate to that page. -
Obtain the Tenant URL and Secret Token from the Portkey Admin Settings page (if SCIM is enabled for your organization).
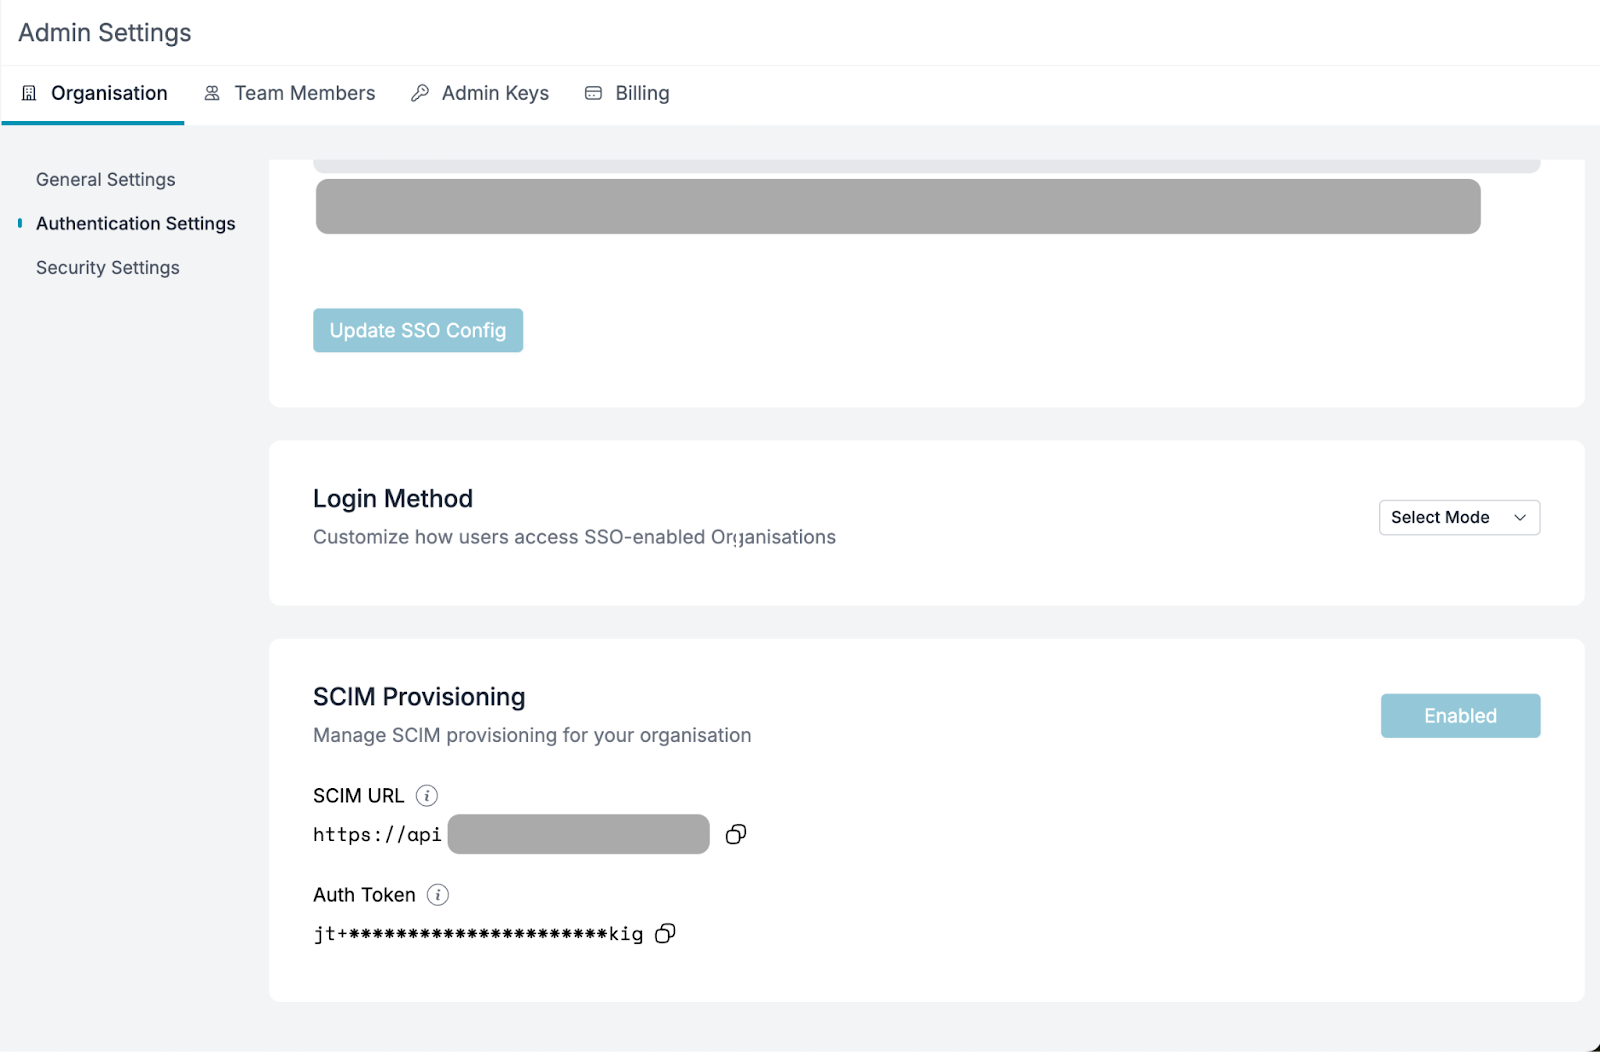
-
Fill in the values from the Portkey dashboard into Okta’s provisioning settings and click
Test Connection. If successful, clickSave.Ensure you choose the Authentication Mode asHTTP Header. -
Check all the boxes as specified in the image below for full support of SCIM provisioning operations.
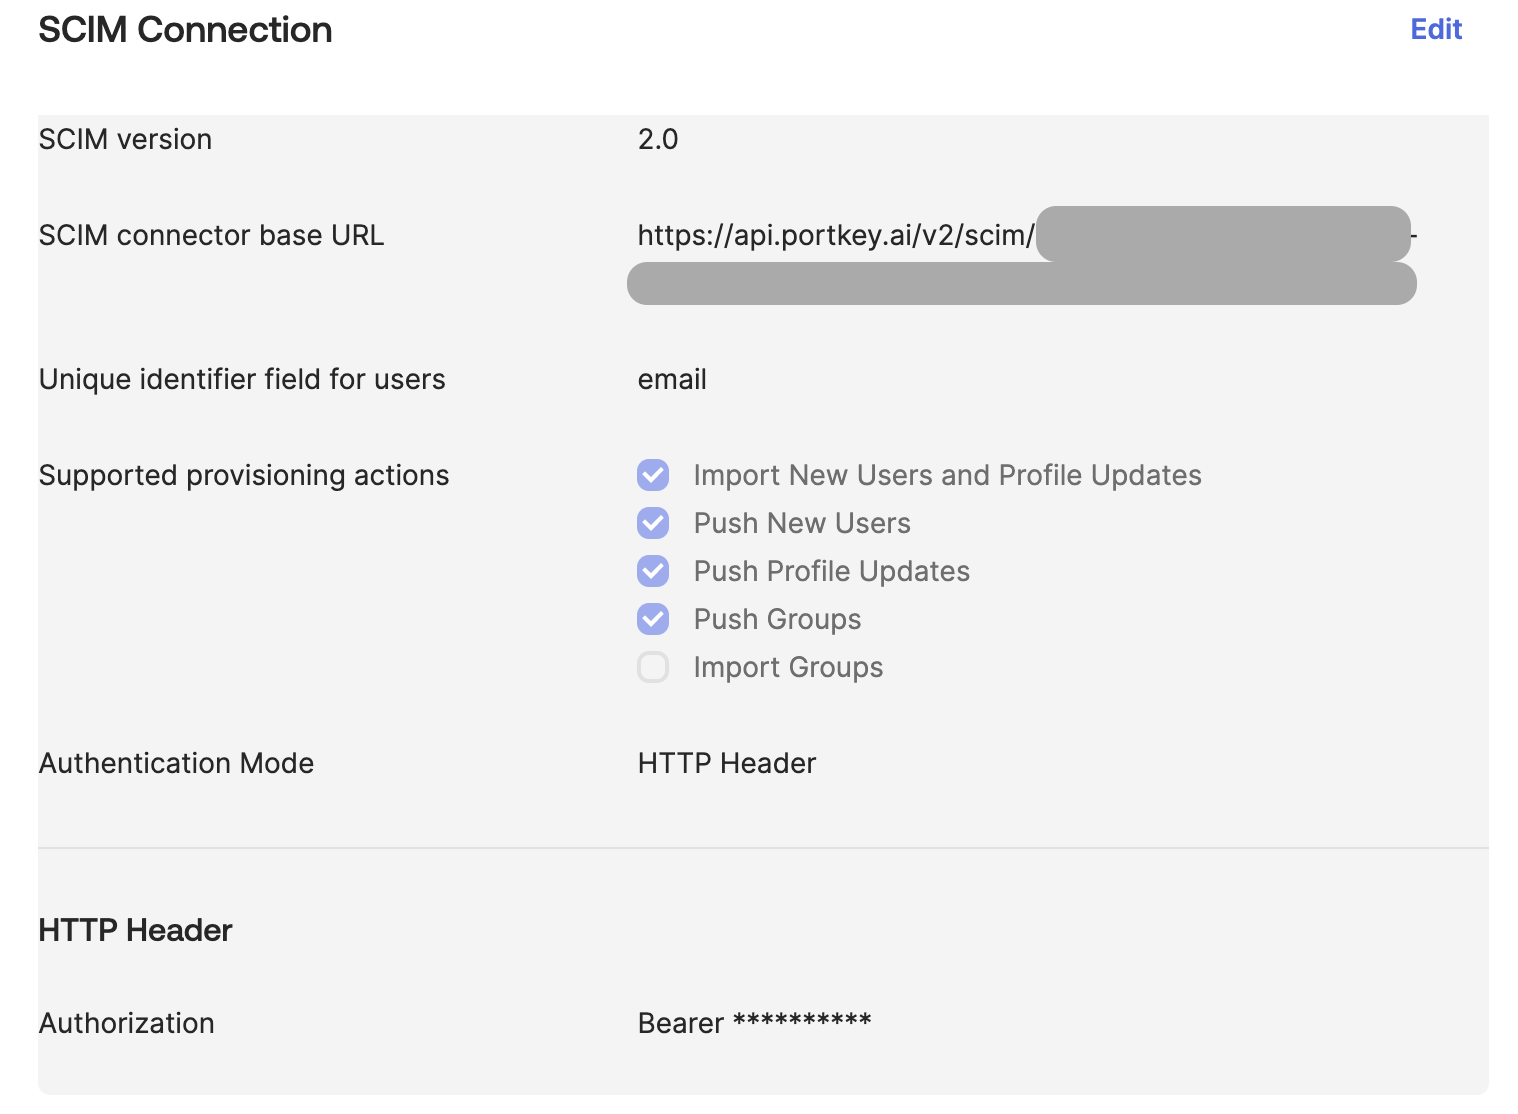
-
Once the details are saved, you will see two more options along with integration, namely
To AppandTo Okta. SelectTo Appto configure provisioning from Okta to Portkey. Enable the following checkboxes:- Create Users
- Update User Attributes
- Deactivate Users
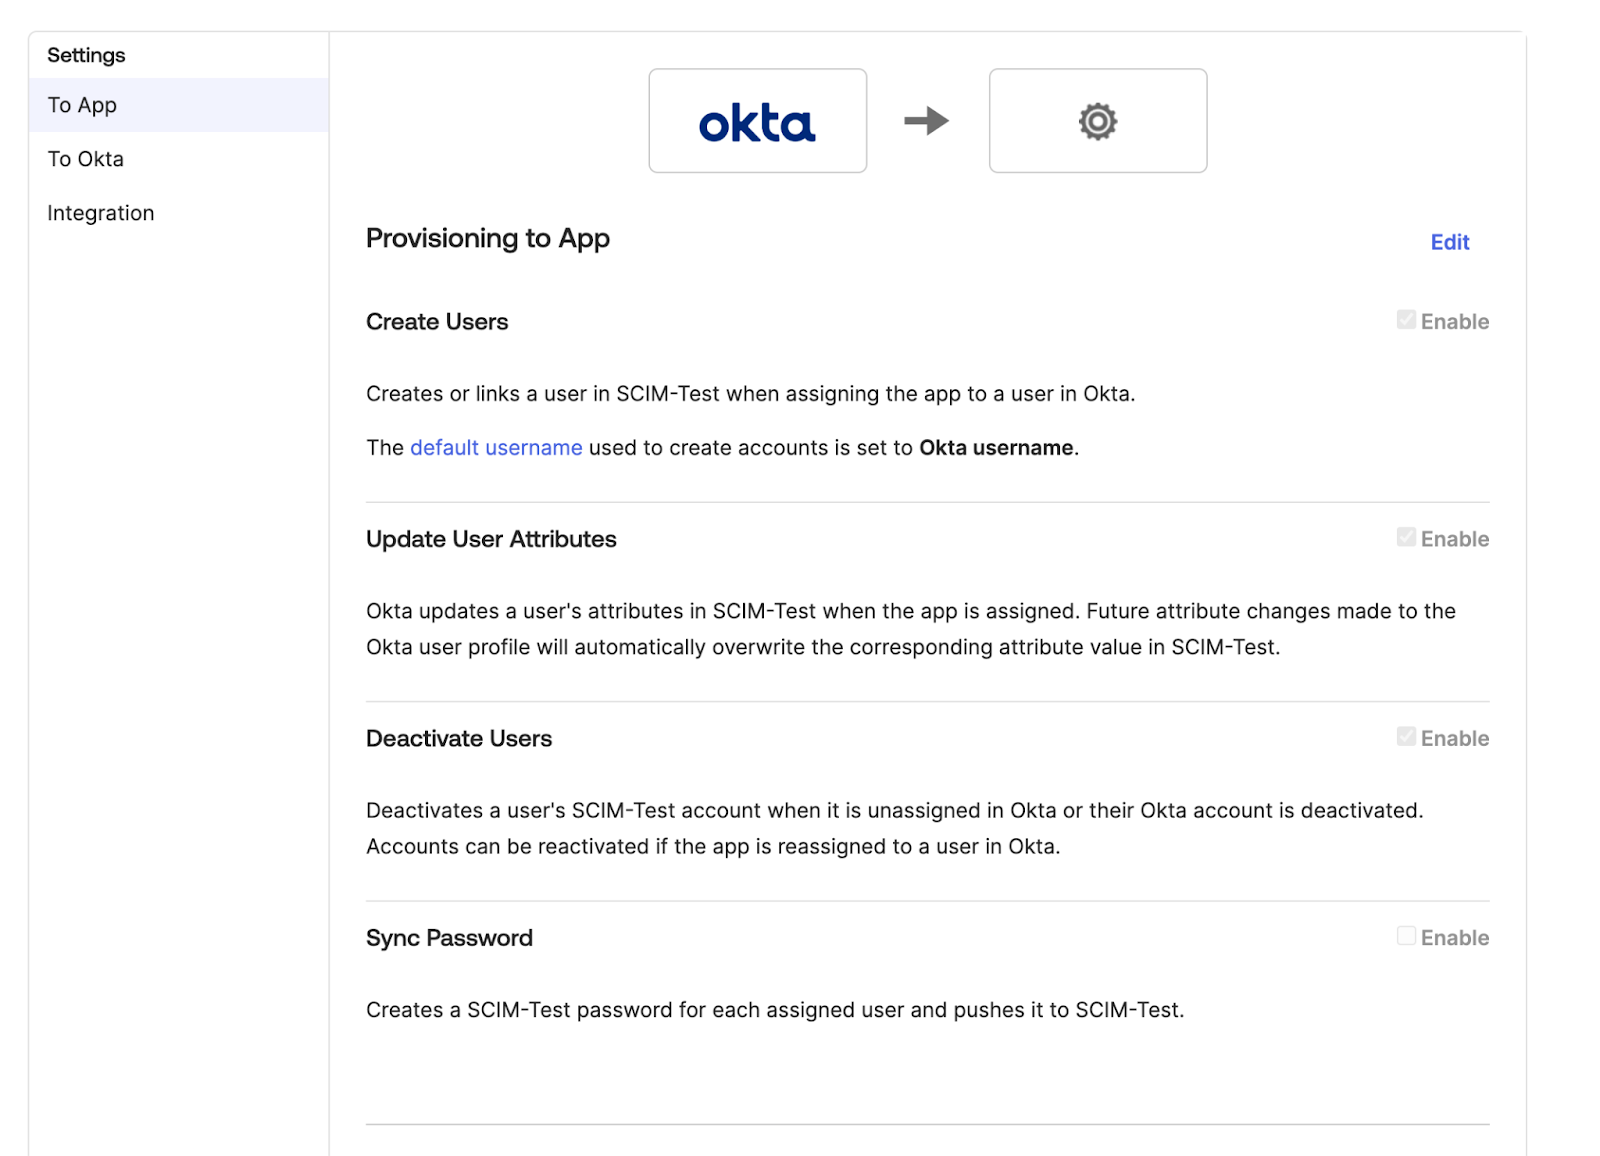

User or Group to the application, Okta automatically pushes the updates to Portkey.
Organisation role support
Portkey supports the following organisation roles:owner(Organization Owner)admin(Organization Admin)member(Organization Member)
Editing Attributes
Okta by default doesn’t support role attributes. To support role attributes, you need to edit the attributes in Okta.-
Navigate to the app settings. Under general settings, click on the
Provisioningtab. -
Click on the
Go to Profile Editorbutton, found under Attribute Mappings section. -
Click on the
Add Attributebutton. -
Fill the form with the following details:
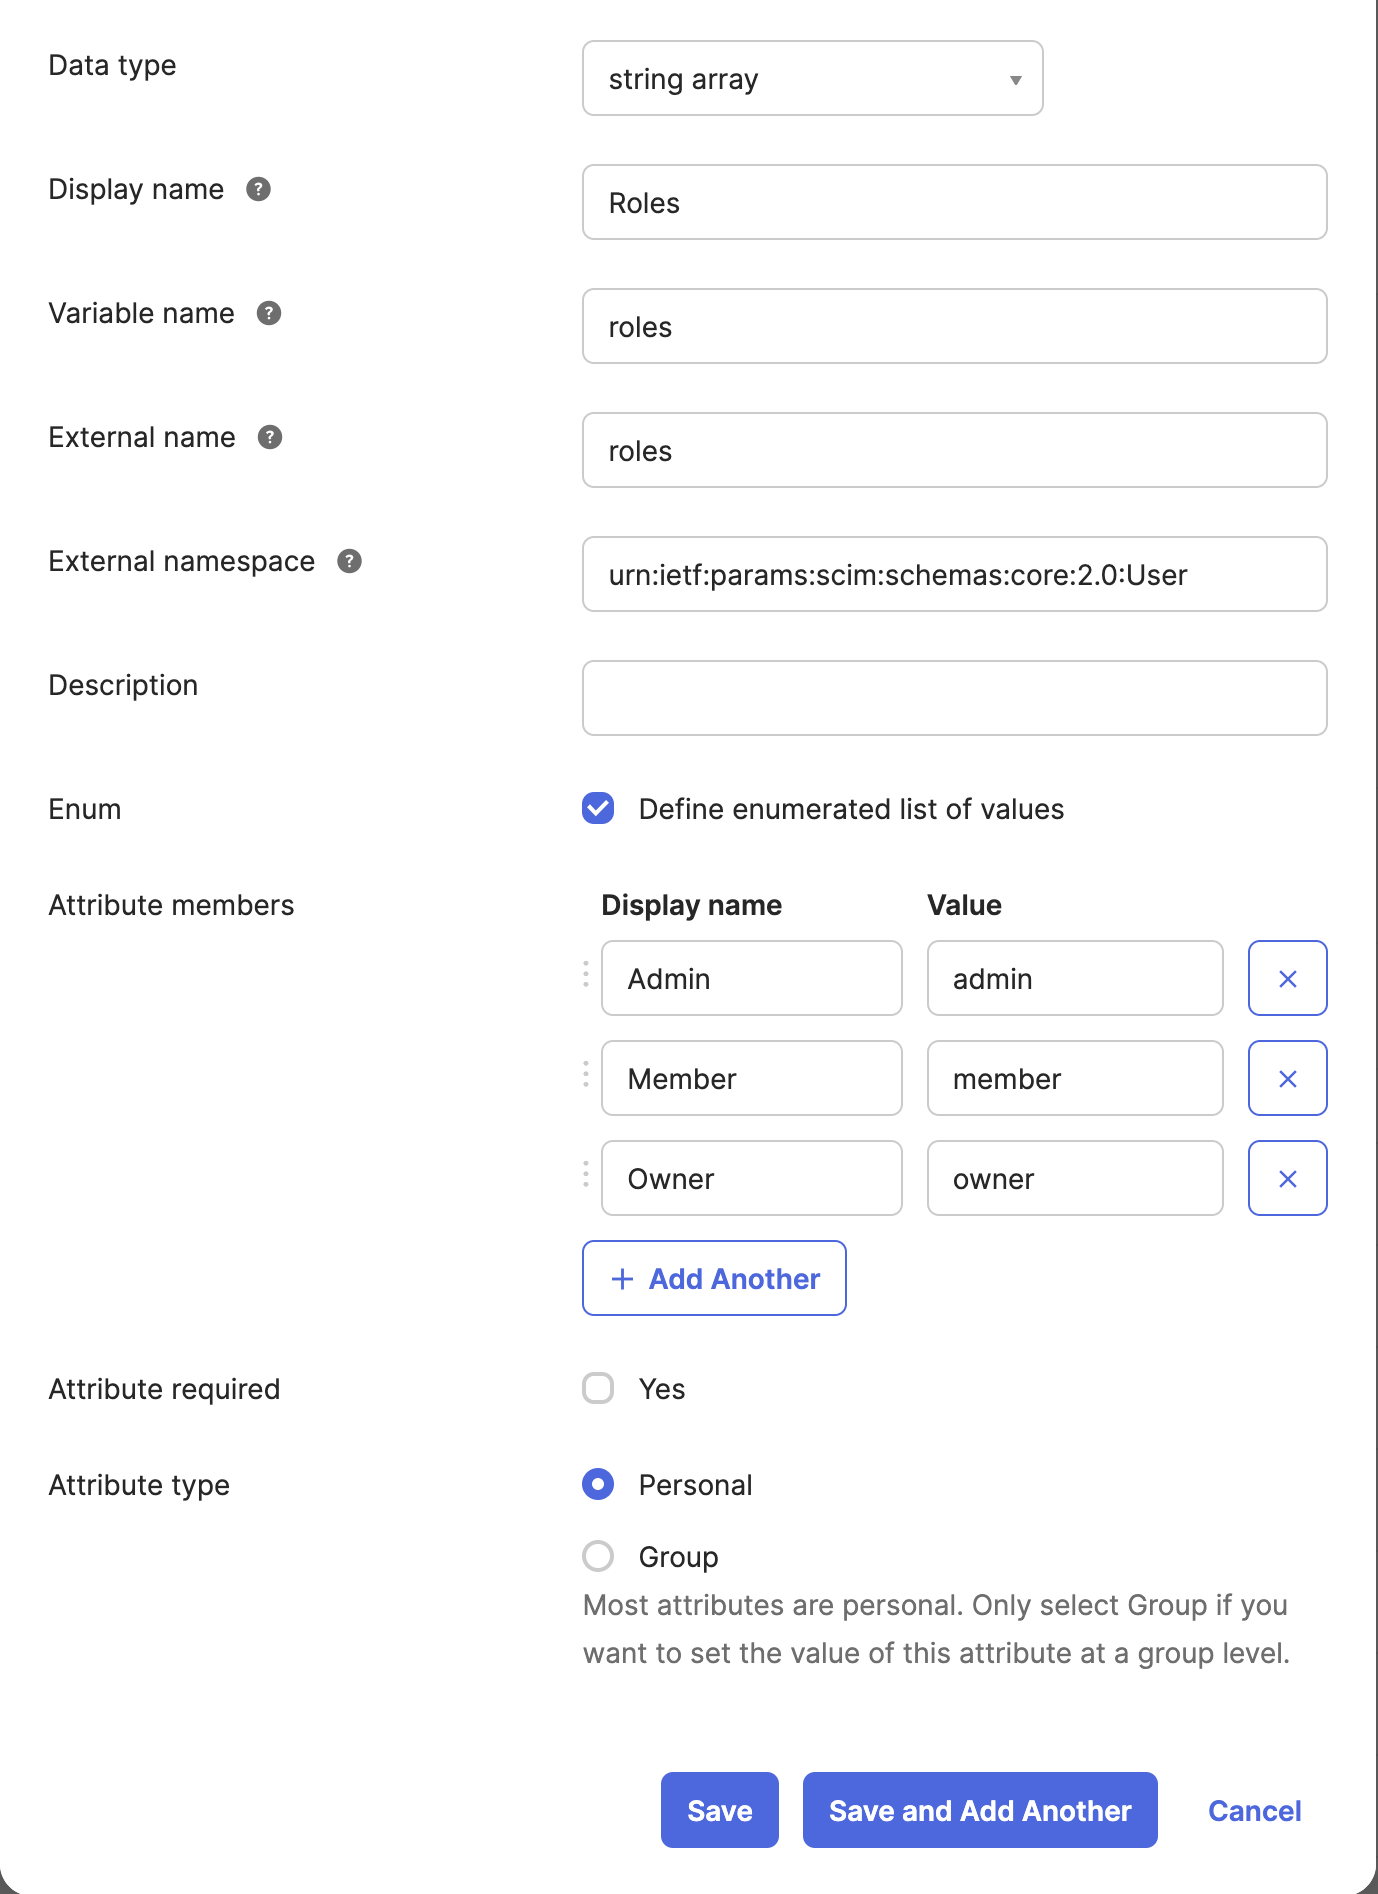
-
Click on the
Savebutton.
Verifying the changes
To verify the changes, you can assign a user to the application with the desired role (e.g.,owner, member, or admin) for the organization.

Group Provisioning with Okta
Portkey supports RBAC (Role-Based Access Control) for workspaces mapped to groups in Okta. You have two options for mapping groups to workspaces: Option 1: Flexible Group Mapping (Recommended) Provision groups with any naming convention from Okta, then map them to workspaces and assign roles directly from Portkey Control Plane. This eliminates the need for specific naming formats.- Push your groups to Portkey from Okta (see steps below)
- Navigate to Admin Settings > Authentication Settings > SCIM Provisioning in Portkey
- Use the SCIM Mappings List section to map groups to workspaces and assign roles
This is the recommended approach as it provides flexibility in group naming and easier management of group-to-workspace mappings.
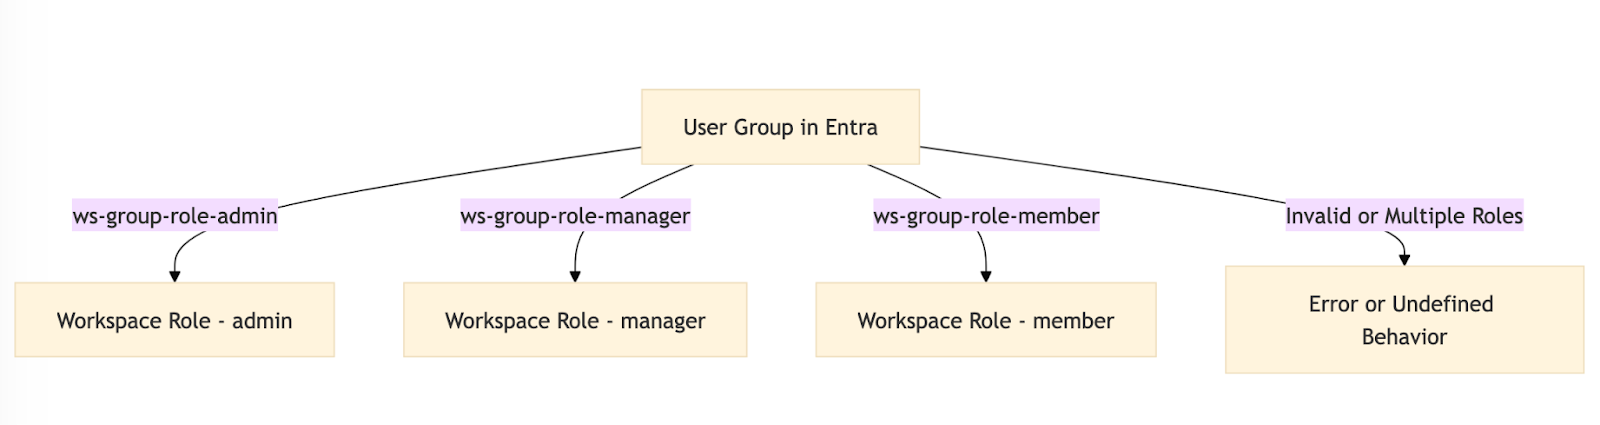
- Format:
ws-{group}-role-{role}- Role: One of
admin,member, ormanager
- Role: One of
- A user should belong to only one group per
{group}.
Sales workspace:
ws-Sales-role-adminws-Sales-role-managerws-Sales-role-member
- Prefix:
ws- - Role Separator:
-role-
ws-{group}{role_separator}{admin,manager,member}
For detailed instructions, see the SCIM Group Management guide.
Push Groups tab. If it is not found, ensure you have followed all the steps correctly and enabled all the fields mentioned in the Provisioning steps.
-
Click on Push Groups.
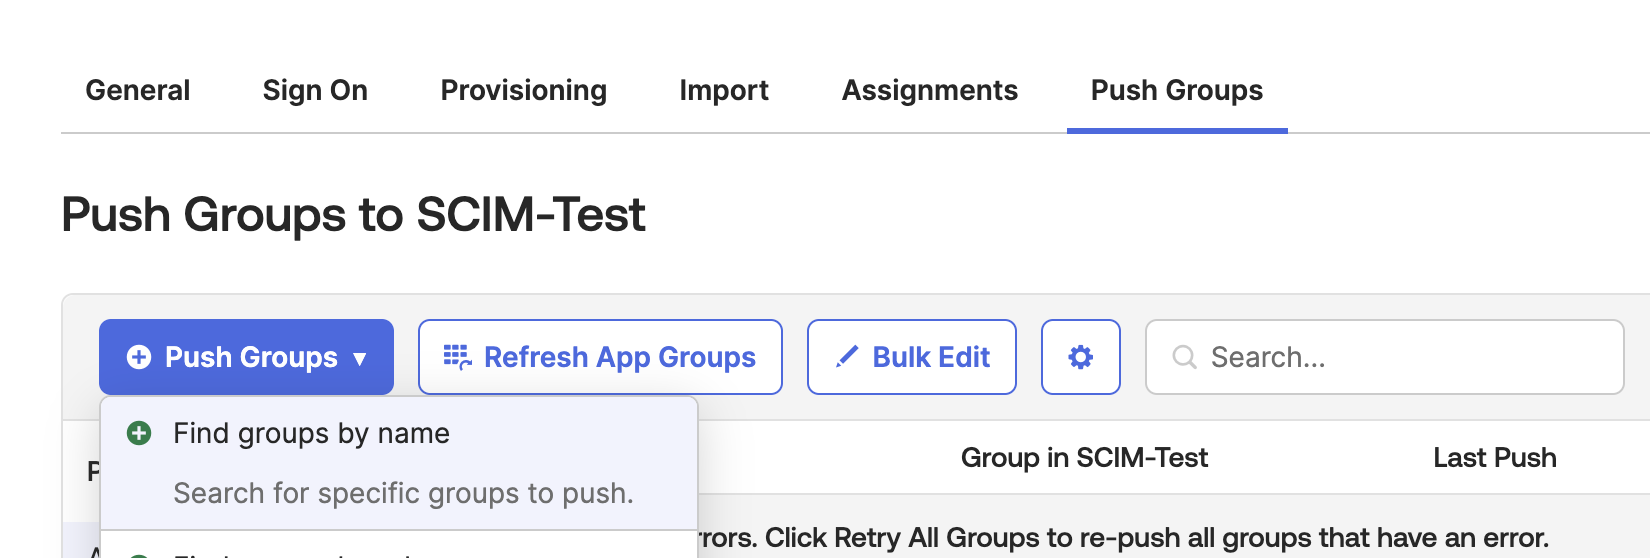
- Select Find group by name.
- Enter the name of the group, select the group from the list, and click Save or Save & Add Another to assign a new group.
If there is any discrepancy or issue with group provisioning, you can retry provisioning by clicking the
Push Now option. This can be found under the Push Status column in the groups list.